|
What is a De-Esser? The 8 Best De-Esser VSTs for Pro Vocals: via LANDR Blog
De-esser plugins are an important part of any pro vocal chain. They help reduce the effect of one of the most frustrating issues in vocal recording. With such a specialized effect, it can be hard to know where to start. How do de-essers work, and what do they actually do? When should you use a de-esser, and how do you use it? In this article I’ll go through everything you need to know about de-essers to mix better sounding vocals. Let’s get started. What is a de-esser?A de-esser is a form of compressor that acts only on the specific frequency range where sibilance occurs in the human voice. De-esser plugins are used in mixing to control sibilance so that loud and bright vocals can sit upfront in the mix without these harsh artifacts taking over. What is sibilance?Sibilance is the grating, unnatural sound that can sometimes occur during recording when a vocalist sings words including the letter S.
The ‘S’ sound naturally contains a lot of energy in the frequency range where your ears are the most sensitive. The extra intensity in this area helps your brain tell words apart, but aggressive sibilance can sound distracting on a recording. Why use a de-esser?Vocal microphones are designed to capture all the subtle details in the human voice. To do it well, they need to be sensitive enough to record a wide range of frequencies. The airy upper high end they capture helps create a sense of realism and intimacy. During the mix you might even bring out these qualities with EQ and compression for an even more powerful, larger than life sound. But with all this emphasis on the high frequencies, the issues created by sibilance get even worse.
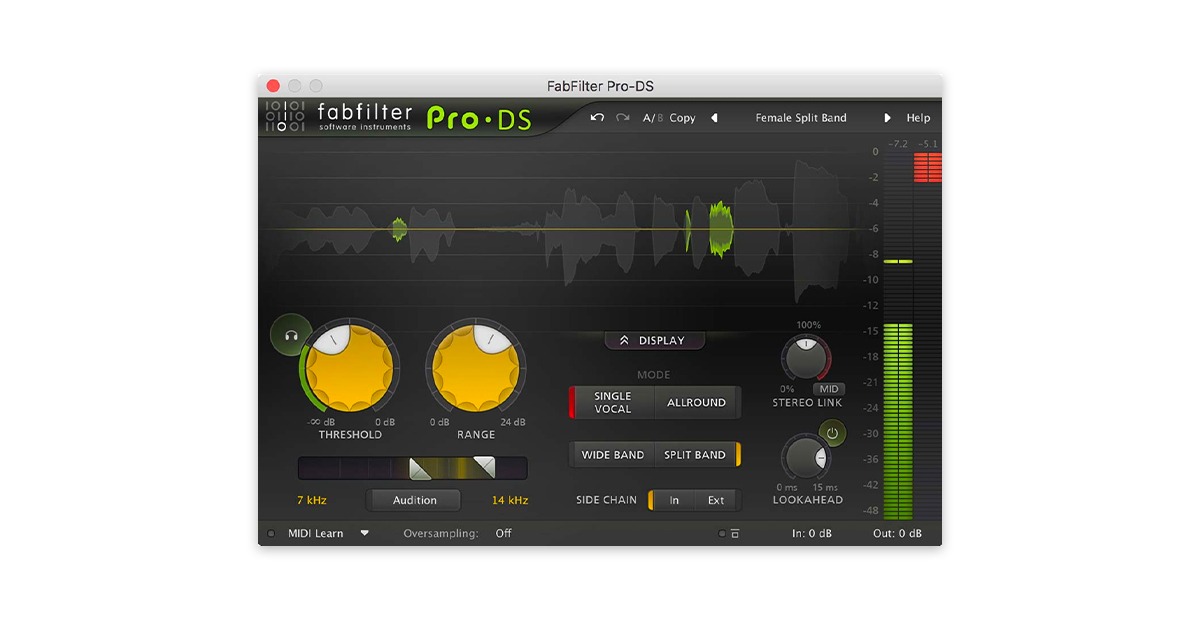
Even if you might not have noticed it while you recorded your vocals, sibilance can creep up in your mix. De-essers are how you reduce it. They work in a similar way to compressor plugins, but instead of reducing the gain by looking at the entire signal, their gain reduction only takes effect when the most sibilant frequencies kick in. The 8 best de-esser plugins for a better vocal mixWith all that explained, here are my top picks for the best de-esser plugins on the market today. 1. Fabfilter Pro-DS
Fabfilter makes some of the most advanced digital mixing tools you can find. Their de-esser plugin is no exception. With gain reduction and filter technology from the award winning Pro-C and Pro-Q plugins, Pro-DS combines powerful signal processing with a a comfortable, easy to understand interface. 2. Waves Sibilance
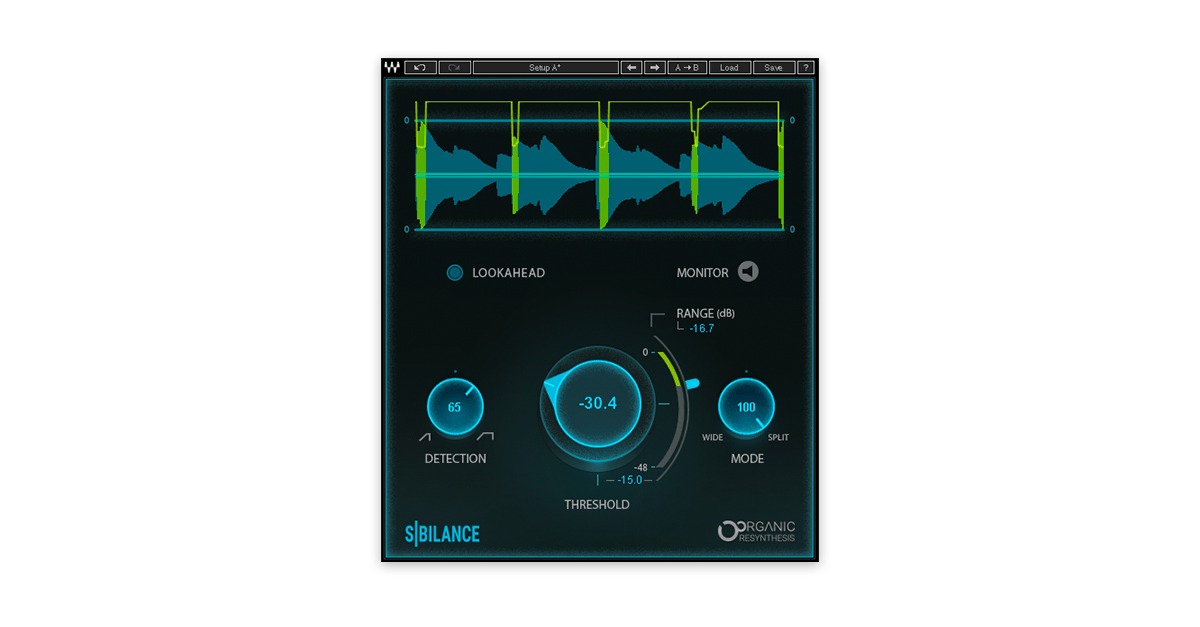
Waves Sibilance is an evolution of the popular plugin makers’ de-essing tools that uses “Organic Resynthesis” technology. Sibilance promises to help you find and reduce sibilance faster and easier than ever. Waves’ traditional Renaissance De-esser is also a great option for standard de-essing duties. 3. Digitalfishphones SPITFISH
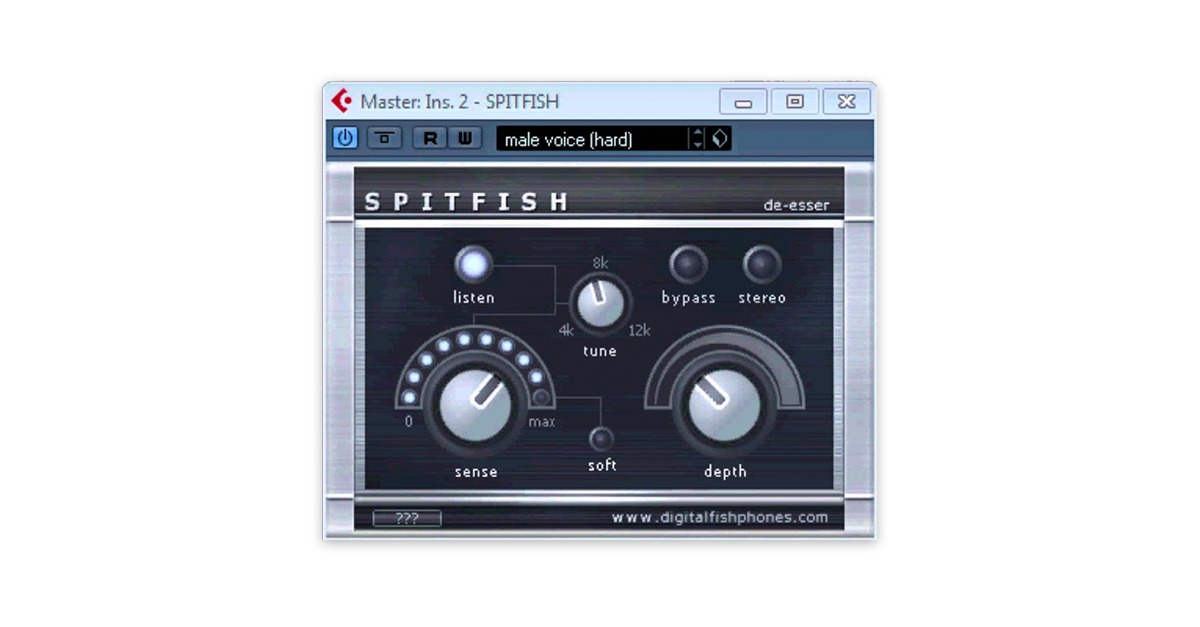
There’s no shortage of advanced de-esser tools out there, but sometimes you need a solution that won’t break the bank. That’s where Digitalfishphone’s excellent freeware SPITFISH de-esser comes in. This super easy to use de-esser is a great place to start for anyone who wants to experiment with de-essing without paying for a new plugin. 4. HOFA IQ-Series DeEsser
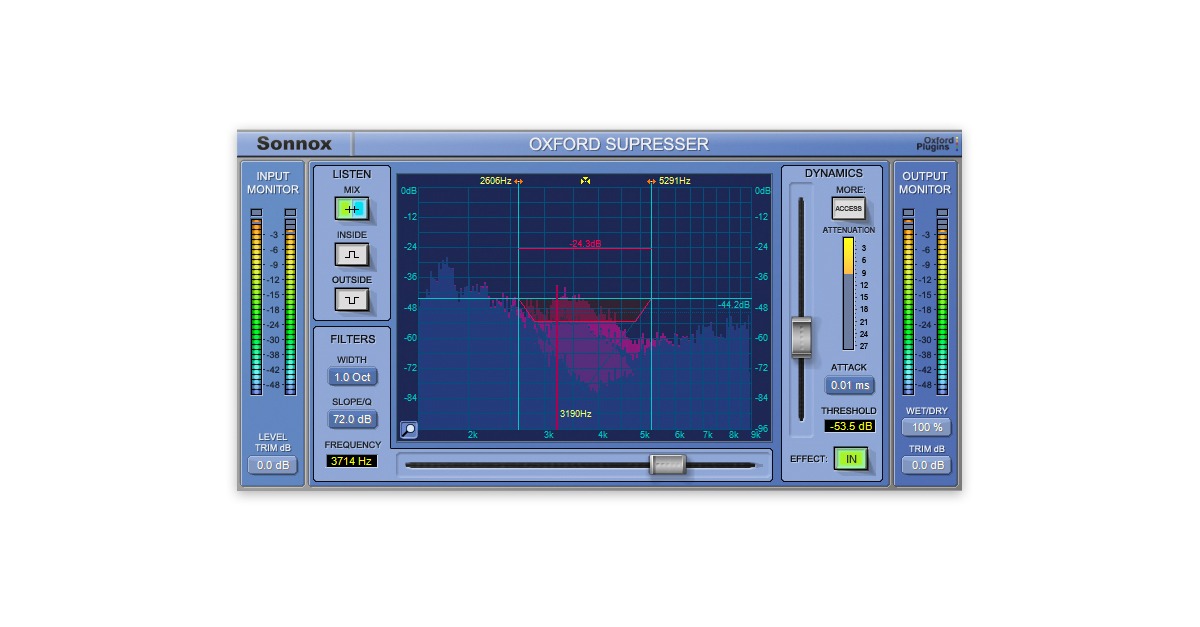
This acclaimed de-esser plugin let’s you dive deep into your vocal tracks to get your de-essing just right. With four different modes, HOFA IQ-Series DeEsser can handle any situation that calls for de-essing. 5. Sonnox Oxford SuprEsser V3
Sonnox Oxford SuprEsser V3 gives you extremely detailed control over the sibilance in your vocal tracks. With auto-levelling features to control how much processing gets applied to signals with different dynamics, SuprEsser V3 takes de-essing to the next level. 6. Your DAW’s built-in De-esser
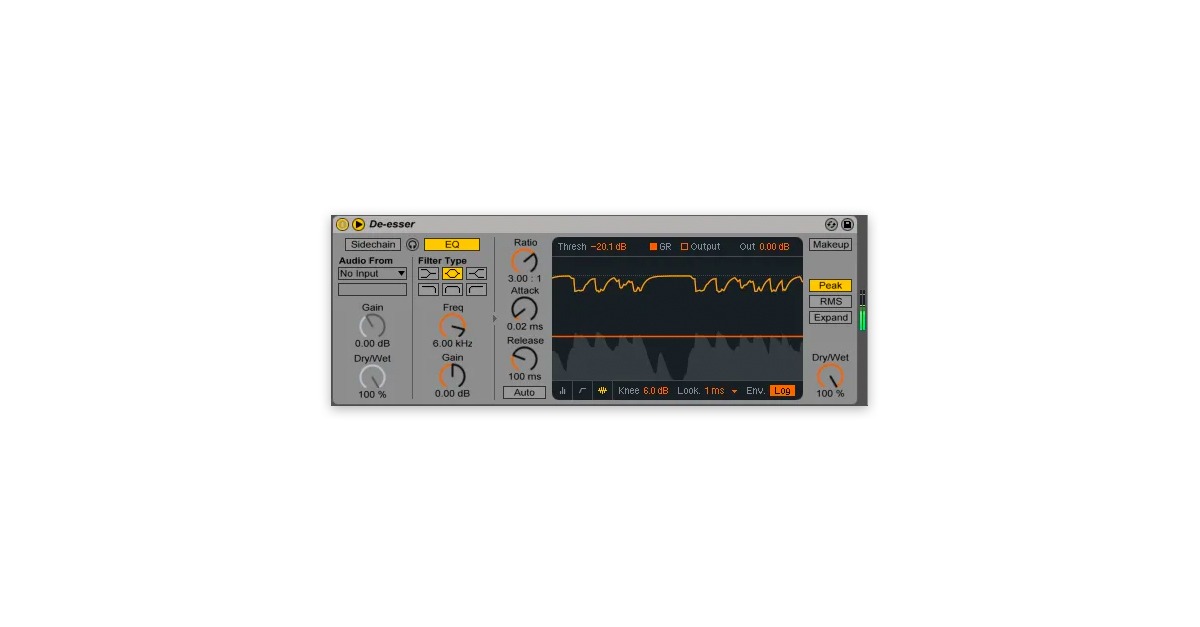
Today’s DAW packages come with robust and effective plugins built-in.
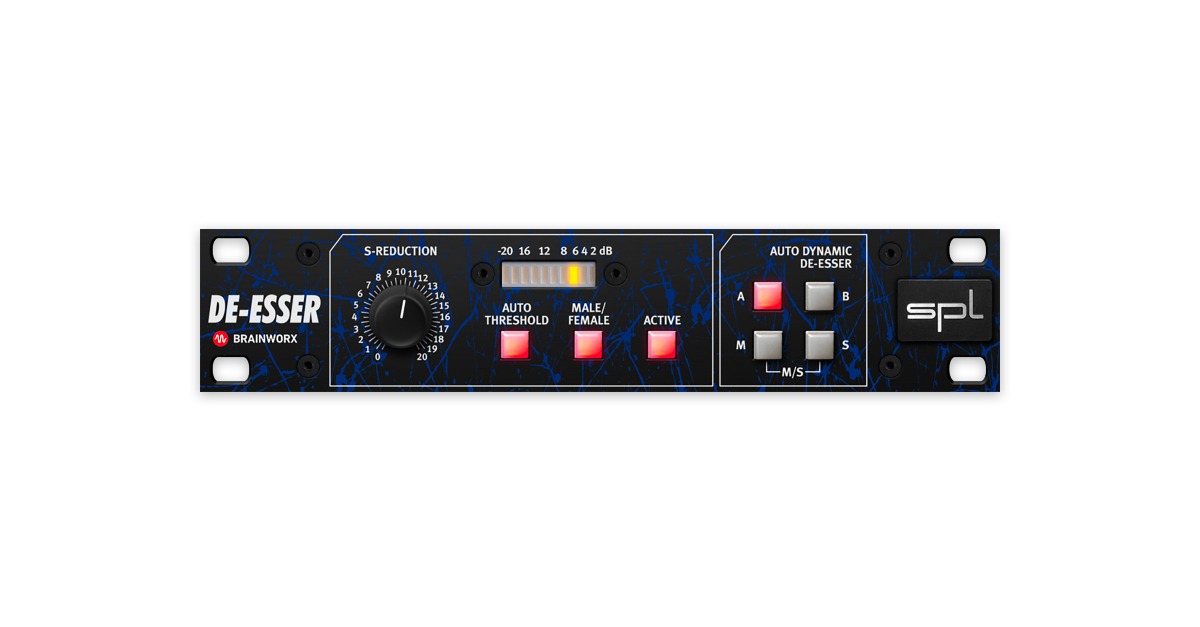
In most cases a skilled engineer can create a perfectly good mix using only these native plugins. De-essing is so common that most flagship DAWs come with a perfectly usable de-essing solution built-in. It might be smart to try your DAW’s standard de-esser before you look elsewhere. 7. Brainworx SPL De-esser
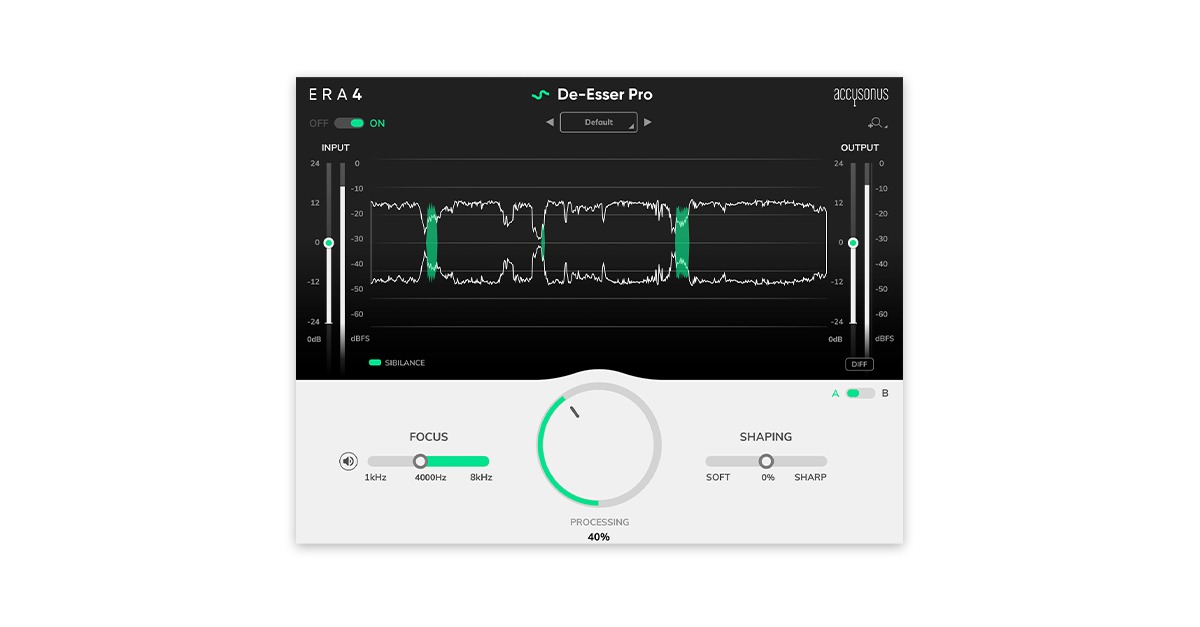
Brainworx SPL De-esser faithfully models a classic hardware de-esser from German manufacturer SPL. If you’re looking for a simple to use de-esser with the sound quality of analog hardware, this one is worth a try. 8. Accusonus Era De-Esser Pro
Accusonus Era De-Esser Pro is another de-esser that focuses on getting results fast with easy to understand controls. The waveform display and simple three parameter layout will help you get your sibilance reigned in quickly. How to use a de-esserNow that you have an idea of some of the options out there for plugin de-essers, you might be wondering how to actually use them in your workflow. Luckily de-essers are some of the easiest plugin types to use. Not all de-essers work the same way, but here are the basics when it comes to using them to decrease sibilance.
Get rid of sibilanceDe-essers are very common in vocal production. Even the most flattering microphone can have issues with sibilance sometimes. But with modern plugins, harsh ‘S’ sounds won’t sink your mix completely. A good de-esser can reduce the effect of sibilance enough to push your vocal upfront in the mix where it belongs. If you’ve made it through this article you’ll have a solid grasp on how de-essers work and some ideas for how to use them in your mix. The post What is a De-Esser? The 8 Best De-Esser VSTs for Pro Vocals appeared first on LANDR Blog. from LANDR Blog https://blog.landr.com/best-de-esser-plugin-vocals/ via https://www.youtube.com/user/corporatethief/playlists from https://stevehartcom.tumblr.com/post/632698763060887552
0 Comments
Plugin Picks: 5 Inspiring Free VSTs to Get in October: via LANDR Blog
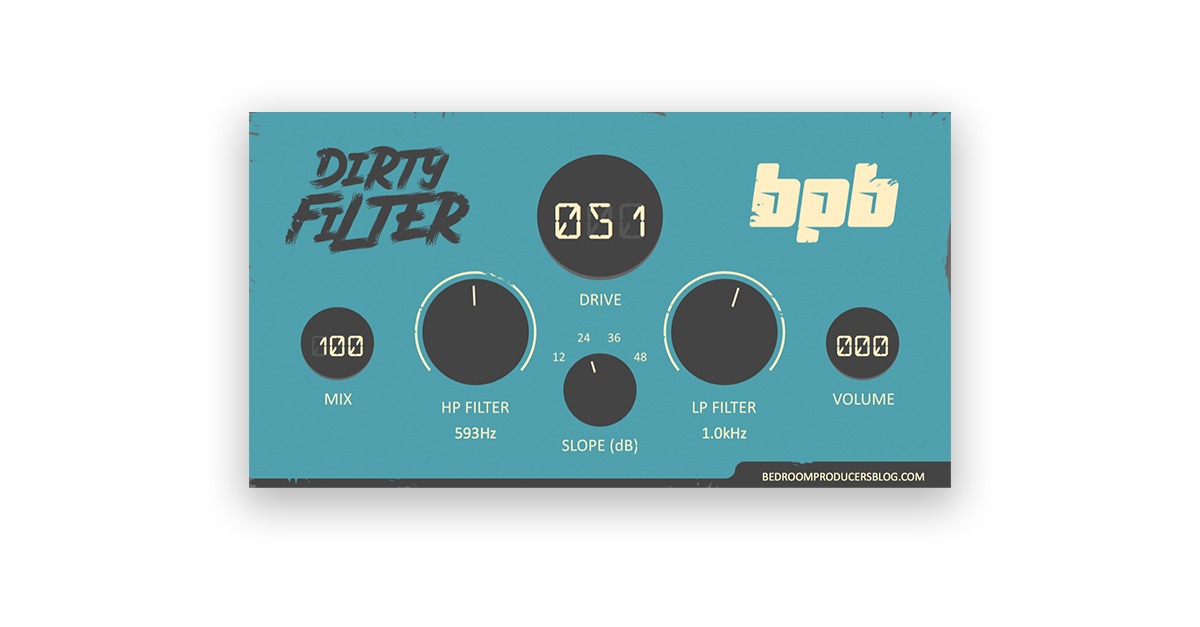
Free plugins are one of the best things about being a producer in 2020. Quality music production tools have never been more accessible for the average musician. But with more freeware plugins showing up on the scene every day, knowing which ones are worth your time isn’t easy. That’s why we’re bringing you our top picks for the most useful and creative free music software every month. In this edition--nasty filters, rare vintage synths, lo-fi vibes and more. Today’s roundup of inspiring free plugins covers a lot of ground. From the latest in trending lo-fi textures to experimental synthesis algorithms, there’s something in this collection for every producer. Here are the free plugins we loved in October. 1. BPB Dirty Filter
Nothing turns up the heat on the satisfying squelch of a filter like a little bit of grit. That’s why the developers over at Bedroom Producers Blog built the BPB Dirty Filter plugin. This combination low-pass/high-pass filter can handle all your classic filter effects, but it really shines when you turn up the drive. The smooth but powerful saturation helps bring out all the unique resonances in the filter sweep.
The mix knob means you can use BPB Dirty Filter in parallel to animate an entire mix without completely destroying its basic character. And with slopes as steep as 48 dB/octave, Dirty Filter lets you sculpt your sound into interesting narrow notches—perfect for sound design! 2. Digital Systemic Emulations CX5M-V
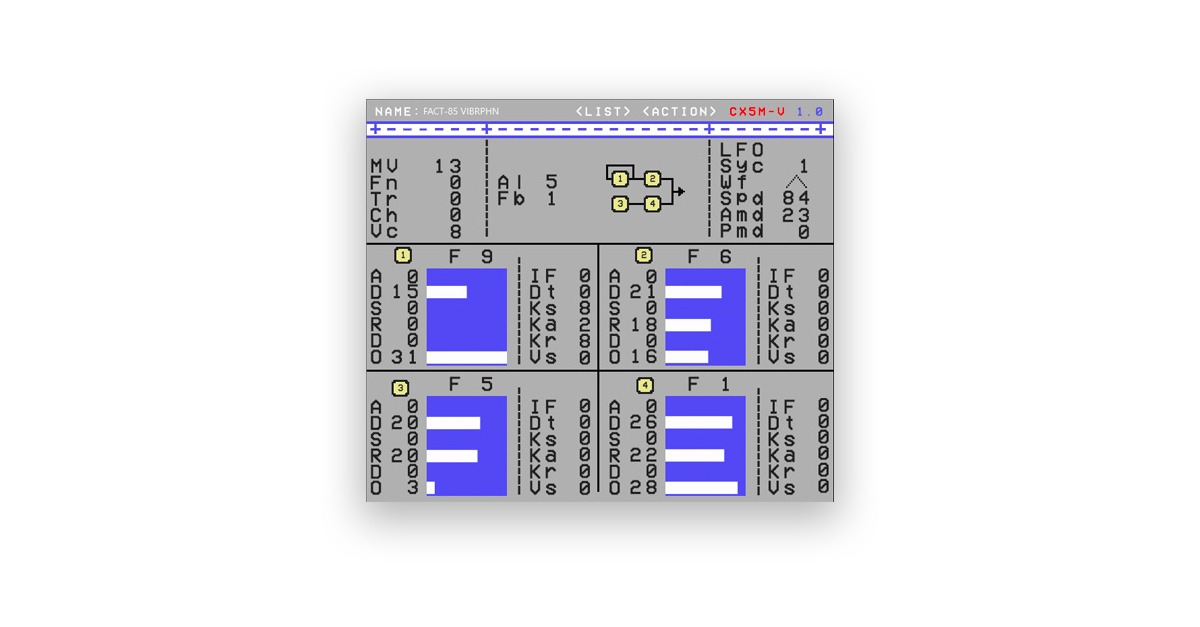
Here’s a rare synth I bet you haven’t heard of—the Yamaha CX5M. This keyboard-shaped oddity is technically a computer. Attach a screen to the original hardware and you could access a primitive sequencer and 8 voice, 4 operator FM synth. The console terminal format of this experimental music computer never caught on, but the same technology powered Yamaha’s massively successful DX7 keyboard. There’s plenty of FM synths out there, so what makes this one unique? Early digital hardware is notoriously quirky. Packing the processing power required for synthesis into a 1980s era consumer computer was no small feat.
Creative engineers had to cut corners and use workarounds to make it happen. The result is a nostalgically lo-fi FM tone that’s unlike anything else out there. Now that otherworldly feel of vintage FM is captured perfectly in a VST—it might be just the flavor you need in your plugin folder. 3. Sender Spike Modul8
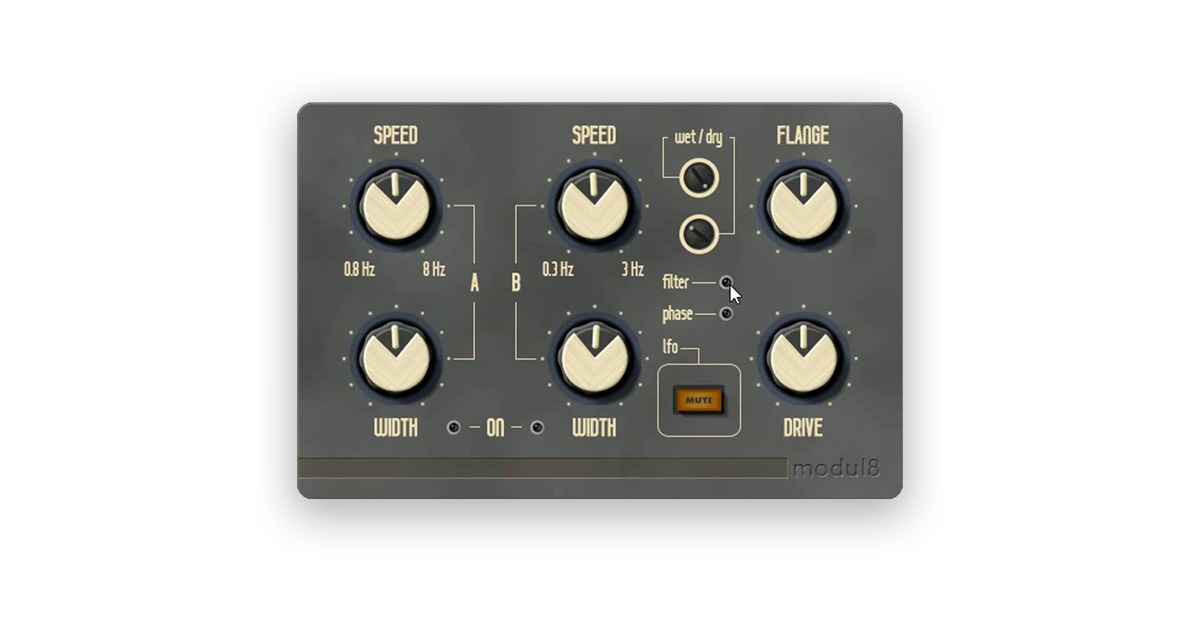
FM and chorus go together like bread and butter. That’s why the next free plugin is a unique dual LFO chorus modelled on vintage Japanese stompboxes. Use it with the CX5M or wherever you need to get your mix moving and modulating. The unpredictable swirl of multiple LFOs can really make a boring chorus unique.
Invert the phase to widen the stereo image, turn up the feedback to mix chorus with flanging or increase the drive to add some grit. Everyone needs a good chorus, so give this one a try! 4. UhhYou Light Pad
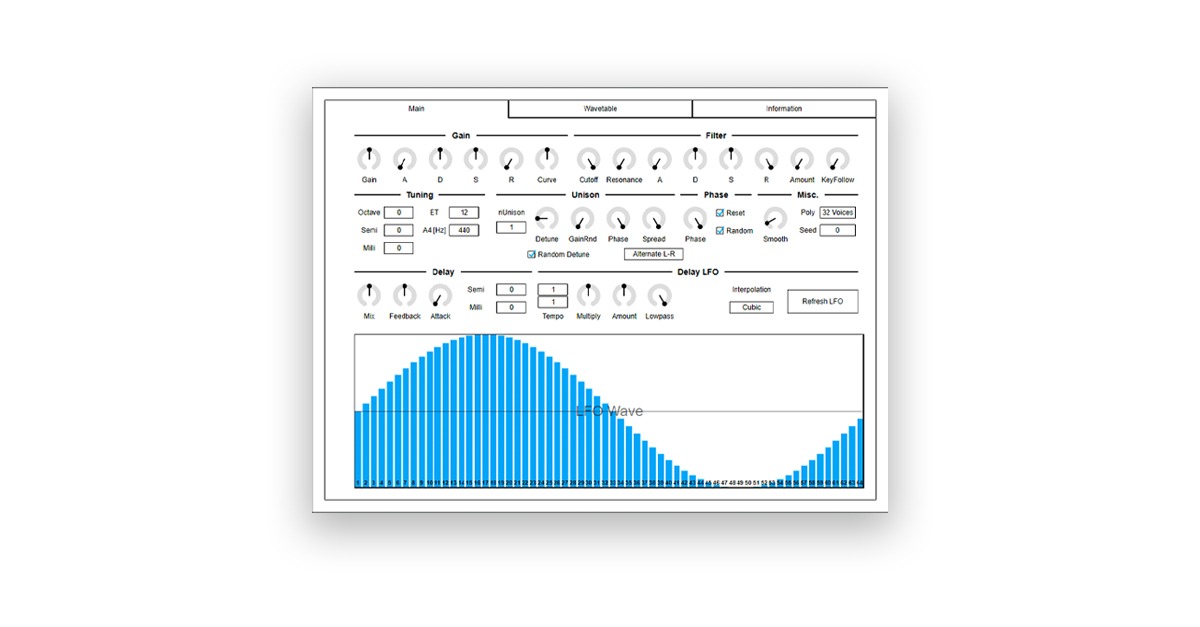
Here’s a unique synth based on algorithmically generated wavetables. UhhYeah Light Pad’s scientific approach to waveforms can create strange and sometimes unpredictable results. Light Pad is the lightweight edition of UhhYou’s Cubic Pad. Both are powered by Paul Nasca’s interesting PADSynth algorithm. The best part is that you get to manipulate the waveshapes directly using a visual editor If you’re tired of endless emulations of old analog hardware, Light Pad could be the futuristic computer synth of your dreams. 5. Caelum Audio Tape Cassette 2
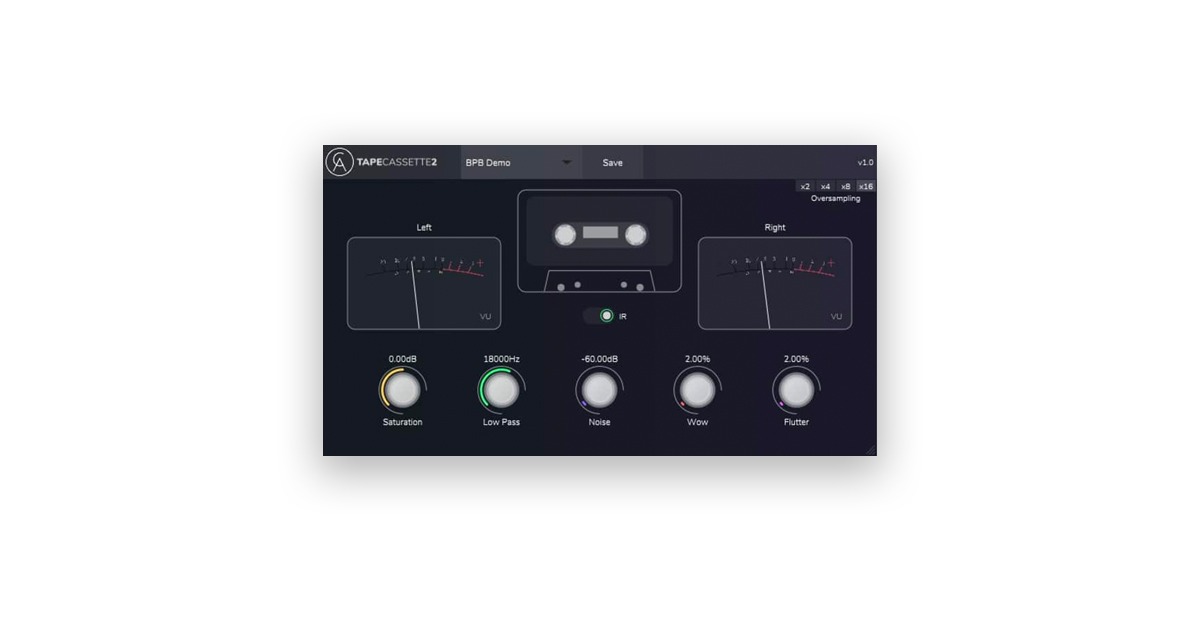
On the other hand, if you can’t get enough of the golden age of audio tech, Caelum Audio Tape Cassette 2 will take you back to the heady days of analog.
This tape emulation gives you all the warmth, noise and subtle wow and flutter of an old cassette. Warm up sterile synth VSTs, add subtle modulation to vocals or grunge up your drum bus with pure vintage vibe. Free is the best priceKeeping up with every single free plugin takes a lot of effort. Check back in with LANDR to get an easy digest of the best new releases you need in your plugin folder. If you’ve made it through this article you’ll know about some great new plugins you can download for free to get inspired. The post Plugin Picks: 5 Inspiring Free VSTs to Get in October appeared first on LANDR Blog. from LANDR Blog https://blog.landr.com/best-free-plugins-october/ via https://www.youtube.com/user/corporatethief/playlists from https://stevehartcom.tumblr.com/post/632528864022773760
What is Timbre in Music? Sound Color and Texture Explained: via LANDR Blog
The sounds you use in your music each have their own distinct character. Whether they come from VSTs, sample packs or your audio interface, the quality that makes them unique is called timbre. Timbre is a basic concept in music that affects everything from sound design to arrangement and mixing. With such a fundamental topic it can be tough to know where to start. In this article I’ll explain what timbre is and show how it’s relevant to your workflow. What is timbre in music?Timbre (pronounced TAM-ber) is the tone color or texture of a sound. It’s the quality of sound that lets you tell the difference between two instruments playing the same note. Timbre is hard to explain because it’s influenced by many different mechanisms in music perception and cognition. Even so, understanding what makes two tones different from one another will help you make decisions about the sounds in your music.
What makes up a sound’s timbre?There are five basic characteristics that contribute to a sound’s timbre. I’ll go through each and explain how they work. Noisiness vs. TonalityIt’s easy to tell the difference between a cymbal crash and a synth lead right? One is percussive and noisy, the other is rich and sustained with a clear pitch center. The biggest difference between the two is the quality of pitch. When you can clearly a sound’s pitch as a letter of the musical alphabet, it means it’s periodic. That’s when the basic pattern of the waveform repeats over and over again with the same shape. Think of a basic square wave like the one you might use to build a lead or bass sound in your synth. Even if you change its frequency or amplitude, the wave’s basic shape will stay the same. The opposite is an aperiodic sound like the cymbal crash. Even if you produced a sustained tone with the cymbal, the basic pattern of its waveform would never repeat itself. Looking on an oscilloscope, the wave would seem random with unpredictable peaks and valleys. The more aperiodic the sound, the more noisy and discordant it seems. Even so, aperiodic sounds are essential in music. Struck percussion like snares and hi hats are aperiodic—try to imagine modern music without those! The balance between noisiness and tunefulness in a sound is one of the easiest timbral qualities to notice.
Harmonic contentAny complex sound—periodic or aperiodic—is made up of a fundamental frequency and overtones that resonate above it. The combination of a sound’s fundamental with all its overtones makes up how it sounds overall. The pattern, structure and intensity of the harmonics in a sound determine a lot about their timbre. If a sound’s overtones appear above its fundamental at regular intervals, it’s harmonic. If the overtones are randomly scattered above the fundamental, it’s inharmonic. Dense harmonic overtones contribute to the richness and tunefulness of a musical sound. For example, the sweet, resonant tone of a bowed cello string is a highly harmonic sound rich in harmonic overtones. The quality of a sound’s overtones and their intensity determine a lot about its timbre. OnsetThe initial moments of a sound are extremely important for how your brain judges musical timbre. In audio these short bursts of sound at the onset are called transients. Transients are key for the systems in your brain that help you identify the source of a sound.
These systems likely developed to help our ancestors recognize danger quickly and react in time. A sound’s transients can be aperiodic even if the rest of it has a periodic structure. This means that the initial moments of a sound can give it a completely different timbre overall. EnvelopeA sound’s amplitude envelope is how its intensity evolves over time.
For example, the slow attack time of an atmospheric pad sound means that it fades in smoothly before reaching full volume. Sounds in the real world have an amplitude envelope as well. Some sounds are sharp and decay quickly while others gradually build and sustain as they ring out. Envelope also helps give your brain clues about the source of a sound, so it’s an important factor in timbre. Why should you care about timbre?The sonic qualities that influence timbre show up everywhere in music production. But they’re especially important to know for some steps in your workflow. Here are the top three issues for music producers that involve timbre. 1. Sound designSound design might seem like a dry technical term, but it comes up often in most producers’ workflows. If you’ve ever tweaked a synth patch, manipulated your samples or changed a sound with audio effects you’ve done it too! Check out our intro guide to sound design for a deep dive into techniques for working with timbre in sound design. 2. ArrangementArrangement is the structure and organization of the sounds in a musical composition. What instruments or sounds should play which parts in your song? What ranges should they play in and how should they interact with each other? The end result has a big effect on the timbre of each element and the overall texture of the track. For example, some instruments and synth patches have a completely different tone when playing loud, accented passages. Others sound different whether they play in high or low registers. Some elements in your mix might even take on new characteristics when they blend together with each other Pay attention to how timbres shift and evolve as you build your song’s arrangement. 3. MixingMixing is about blending all the different timbres of all the different tracks in your mix together. It’s how you create a balanced sound where every element can be heard clearly. Tools like compression, EQ and reverb are used in mixing to make adjustments to the timbre of individual tracks in your mix.
Does a sound’s aggressive transients stick out too much? Does its envelope cause it to disappear too quickly to be heard? Issues like this can be solved using compression. What about the balance of its harmonic content? Is it lopsided with too much emphasis in one frequency range? That’s where EQ comes in. Many processes in mixing match up this way with the qualities that affect timbre. Check out our intro guide to mixing to see how these techniques come together to build a mix. Sound color and textureUnderstanding timbre is the key to making informed decisions about the sounds you work with in your music. It may seem academic at first, but the basic characteristics of sound are relevant at every stage in the lifecycle of a song. If you’ve made it through this article you’ll have a solid headstart on how timbre affects your workflow. The post What is Timbre in Music? Sound Color and Texture Explained appeared first on LANDR Blog. from LANDR Blog https://blog.landr.com/what-is-timbre/ via https://www.youtube.com/user/corporatethief/playlists from https://stevehartcom.tumblr.com/post/632438285294321664
Artistic Evolution: How 3 Modern Pop Stars are Changing the Game: via LANDR Blog
So many artists that have found success with a signature style are content to stick with a formula. The enormous effort it takes to break into the industry leaves many at the top unwilling to take risks. But there are certain pop visionaries who can’t help but reinvent themselves—and their craft. In this article I’ll look at some of the most creative artists currently rewriting the rules of mainstream pop. Change is the only constantGo back in history and check out the legendary pop artists that changed the game. The Beatles, Prince and Madonna all pushed to re-define the genre with each project they embarked on.
Today, artists reinvent themselves to discover new creative realms, cultivate new audiences, and explore their unique cultural background. A few recent success stories prove that sticking to the formula isn’t the only way to make a mark. That creative spirit is paying off—for listeners and the industry. Here are my top picks for pop artists who reinvented themselves in 2020. ROSALÍA: traditional and contemporaryWith her second album, “El Mal Querer”, Barcelona-born artist Rosalía proved that singing in English is not necessary to break into the mainstream. But “El Mal Querer” is no ordinary record—music critics call her music “flamenco pop”. Rosalía’s music is heavily influenced by traditional flamenco, which she masterfully melts into modern R&B and trap.
The minimalist, 808-driven productions paved Rosalía’s way towards worldwide recognition. It’s a sound that’s familiar enough to engage mainstream pop listeners. But the mesmerizing timbre of her voice and rhythmically intricate flamenco claps create a unique feel that’s truly refreshing. While Rosalía’s roots lie in the traditional music of her culture, her forward-thinking adaptation of modern styles puts her at the forefront of international pop. BTS: a style all their ownK-pop is a worldwide phenomenon that’s found a massive audience in the west. But before Blackpink’s star-studded debut took over the airwaves, BTS and other K-pop acts were laying the foundations for the genre to explode. That popularity continued to surge as K-pop artists began recording songs in English and experimenting with western genres. The disco-pop hit “Dynamite” was the first BTS single sung fully in English, but the band’s carefully rehearsed choreography and meticulous styling remained pure K-pop. It’s a perfect example of how these artists adeptly follow trends while infusing them with their own culture and vision. With more and more western stars releasing new work with K-pop acts, it’s clear that we’re not witnessing a temporary trend.
All in all, artists with unique cultural backgrounds are getting more attention than they ever had before. Hopefully, musicians who come from non-English speaking countries find this inspiring. If you are an independant international artist, remember that your unique background is a plus. People don’t care only about those who can adapt—they pay attention to those who stand out. Lady Gaga: artistic chameleonTrends in pop seem to evolve faster every day. That’s why artists who want to stay at the top have to reinvent themselves to survive. If there’s one star who truly embodies this attitude in the American music industry, it’s Lady Gaga. After signing with a major label, she enjoyed a highly acclaimed debut.
She could have continued to make run-of-the-mill dance pop records. Instead, she used her success as leverage to claim her creative freedom. After releasing three pop albums, Lady Gaga first surprised her fans with a collaborative jazz album with Tony Bennett. Two years later she gave us a completely different country pop project—“Joanne”. Little did we know that her experimentation with country music would lead Lady Gaga to one of the most successful hits she has ever released—“Shallow”, the rock ballad sang with Bradley Cooper in the hit Oscar winning movie, “A Star is Born”. As an actor and musician, Lady Gaga continues to prove that she’s not afraid to break into new mediums and transform herself completely to chase inspiration. If you’re an up-and-coming pop artist, take notes. Be true to yourselfIt’s so difficult to pick a creative direction when you’re developing as an artist. Everyone wants to make it big, but most want to do it on their own terms. Don’t make the mistake of sacrificing your vision to accommodate others. As you continue to build your project, contemplate what you stand for. So many re-inventors of pop have already blurred the lines between genres. Are you adventurous enough to do the same? The post Artistic Evolution: How 3 Modern Pop Stars are Changing the Game appeared first on LANDR Blog. from LANDR Blog https://blog.landr.com/artistic-evolution-modern-pop/ via https://www.youtube.com/user/corporatethief/playlists from https://stevehartcom.tumblr.com/post/632166472048934912
Audio Normalization: Should You Normalize Your Tracks?: via LANDR Blog
Audio normalization is a concept that comes up fairly often for new producers. It’s a music production process that’s been around since the earliest days of digital audio, but is it still relevant? It’s not always easy to tell whether to apply normalization or to avoid it completely—and getting it wrong can cause issues in your mix. In this article I’ll break down what audio normalization is, when to use it and when to steer clear. Let’s get started. What is audio normalization?Audio normalization is a process that increases the level of a recording by a constant amount so that it reaches a target—or norm. Normalization applies the same level increase to the entire duration of an audio file. Normalization is typically used to scale the level of track or file to just within its available maximum. If that sounds complicated, all it means is that normalization brings up the volume of a file to the maximum amount based on the loudest point.
When to use audio normalizationAudio normalization might seem a bit old fashioned by modern standards. With all the less invasive ways to increase a track’s gain out there, why would you choose to use normalization? Some applications come from the early days of digital audio. Back then many components had limited performance when it came to dynamic range and signal-to-noise ratio. Normalizing the audio sometimes helped get the best results from primitive AD/DA converters. Normalization is still a common feature on hardware samplers that helps equalize the volume of different samples in the memory. It’s handy in this situation because the dynamic range and signal-to-noise ratio remain the same as they were before. You can use your sampler’s normalize function where needed as you build patches and presets. Why not to use audio normalizationNormalization isn’t commonly used in many music production situations outside of sampling. It might seem like a convenient way to bring tracks up to a good volume, but there are several reasons why other methods are a better choice.
1. Normalization is often destructiveDAWs revolutionized music production with their non-destructive workflow. What does that mean? Think of a strip of reel-to-reel tape—to perform an edit you need to physically slice it with a razor! After that you can’t just go back to the original. But in your DAW you could simply drag the corners of the region out to restore the file. Unfortunately there are some operations in the digital domain that are still technically destructive. Any time you create a new audio file, you commit to the changes you make. Normalization sometimes requires you to create a new version of the file with the gain change applied. If you do this and discard the original, you’re stuck with the normalized version!
2. Other methods are betterModern DAWs have many different options for changing the level of audio signals. Since normalization is a constant gain change, it works the same way as many other types of level adjustments. Before you reach for the normalize function, make sure there isn’t another method better suited to the job. There are few situations where automation, clip gain or a utility plugin can’t fix your volume issues. These operations are non-destructive and more flexible than normalizing entire tracks. 3. Normalization can create inter-sample peaksMany new producers are looking for the easiest way to make their songs loud. It’s a common mistake to think that normalization plays a role. When it comes to raising the level of an entire track, normalizing is among the worst options. In fact, normalizing an entire track to 0 dB is a recipe for disaster.
The normalize function finds the highest peak in the entire waveform and raises it to the target. With this peak touching the 0 dB maximum, things get unpredictable. When digital audio gets converted to analog to play through your speakers, the filters that reconstruct the signal smooth out the curve between individual samples in the file. Sometimes the arc between two points close to the ceiling can exceed the maximum! The result is clipping from inter-sample peaks. It comes out as distracting harshness and distortion in your music. Gain staging—the better choiceProperly controlling the levels inside your DAW is called gain staging. It means checking the volume of each element you record and making sure not to exceed a healthy level throughout your mix. The general rule is to keep your tracks’ peaks around 9-10 dBFS and the body of your waveform at around -18 dbFS.
With all this extra room left over, turning your tracks up using the fader or any of the other methods I’ve mentioned should offer plenty of level control without resorting to normalization. Mastering your mixIf you follow these guidelines for gain staging you might be surprised to hear how quiet your finished bounce seems in comparison to tracks on your streaming platform of choice. It’s because finished tracks need mastering to get the right levels for consumer playback. Mastering brings up the overall loudness of a finished mix to exactly the right volume—no intersample peaks, no wasted headroom. It takes careful processing and lots of experience to get a good master. The easiest way to do it right is to hire a professional or try AI-powered mastering online. Get your levels rightNormalization has its place in music production, but you need to be careful where you use it. Headroom, gain staging and signal level all influence each other. Understanding that relationship is how you get the most out of your mix and master. If you’ve made it through this article you’ll have a great starting point for managing your levels and making the right decisions about normalization. The post Audio Normalization: Should You Normalize Your Tracks? appeared first on LANDR Blog. from LANDR Blog https://blog.landr.com/audio-normalization/ via https://www.youtube.com/user/corporatethief/playlists from https://stevehartcom.tumblr.com/post/631785226131111936
Music Royalties: How You Get Paid for Your Streams: via LANDR Blog
It’s totally possible to make money with your original music. Aside from live performances and physical merch, most artists rely on streaming revenue, royalties and music publishing as the main source of income from their music. But knowing exactly how the royalty system works isn’t always clear cut. There are different kinds of royalties and different organizations that pay them out. Plus, you have to make sure your metadata is properly recorded to collect every cent you’re owed. In this article, I’ll clear up any confusion around the music royalty system and give you the confidence you need to be sure you’re collecting all of your royalties. What are music royalties?Music royalties are payments made to the owner(s) of a particular musical work, recording, melody or performance. They are paid by Performing Rights Organizations (PROs) like ASCAP, SOCAN or BMI, and they’re paid by licensors of a particular work sold by a music publisher. There are two kinds of music royalty--mechanical royalties and performance royalties. What is a performance royalty?A performance royalty is a royalty that’s owed any time your music is played on the radio, TV, streaming website, presentation, video game, in a store or performed in a live venue. Keeping track of all those performances is no simple task—that’s why PROs exist. They collect your performance royalties on your behalf. They work with media companies to collect any royalties owed and they pay out the royalties to any artist who is registered with the PRO.
What is a mechanical royalty?A mechanical royalty is a royalty owed to the composer or publisher of a musical work every time a physical copy of your music is manufactured in physical form, downloaded or streamed. A mechanical royalty is owed whether or not the composer is the one performing it, meaning a mechanical royalty must be paid to the composer if a song is covered. PROs do not collect mechanical royalties. Instead, it’s on the composer or publisher of a piece to collect these royalties. Royalties vs. LicensingYou may be wondering: what about movie deals and big advertising placements? Aren’t those royalties too? The answer is yes and no. You’re entitled to a royalty every time your song is performed on TV or in an advertisement. But these royalties are paid on top of the sync licensing agreement made between your publisher and the media company.
Usually, it’s the sync licensing deals that make the big TV deal style payouts. But, it doesn’t hurt to collect your royalties on top of those sync payments. Of course, you’ll most likely have to work with a publishing agent to find a big sync licensing deal. But, there are a few ways to find them independently too. If you’re curious about sync licensing, we’ve written lots about it in previous articles. It’s a pretty big topic on its own. How to collect all of your royaltiesIf you’re an independent artist who’s starting to get some traction on streaming platforms and radio, you’re probably wondering if you’re collecting everything you’re owed. Here’s how you can make sure you’re collecting your mechanical and performance royalties. Sign up with your designated PROThe first place to start is to sign up with a PRO and start collecting performance royalties. Your PRO will depend on where you live: ASCAP and BMI serve the United States, SOCAN is the Canadian PRO and SESAC serves Europe.
It’s a little bit of paperwork that can go a long way. The good news is that you can retroactively claim any royalties from your PRO, even if you sign up after they’re owed. So if you sign up now, you might get a larger cheque because your royalties have just been sitting there. A PRO can help with performance royalties but what about mechanical royalties? Get your mechanical royalty metadata rightWith digital distribution services, your mechanical royalties are still on the table. Every time your music is streamed, downloaded or purchased physically you are owed this royalty. Don’t lose out on this extra streaming revenue! As long as you don’t have a publishing arrangement with a music publisher, a digital distribution service like LANDR Distribution will collect your mechanical royalties for you. But be careful—when you release your tracks with a digital distribution make sure you record your metadata properly.
Your digital distribution service provider will ask you who owns your music publishing rights. List yourself as the publisher of your own music. Do not list your PRO, since your PRO is not your publisher—you are! The royalty system is complicatedBut with distribution service providers who support independent artists, it’s easier than ever to ensure you’re collecting everything you’re owed. At the end of the day, no artist wants to spend time stressing about the dated and overly complicated royalty system. That’s why trusting a digital distribution service provider like LANDR takes the stress away from the business side of music and lets you focus on what matters most—making beautiful art!
The post Music Royalties: How You Get Paid for Your Streams appeared first on LANDR Blog. from LANDR Blog https://blog.landr.com/music-royalties/ via https://www.youtube.com/user/corporatethief/playlists from https://stevehartcom.tumblr.com/post/631513435863154688
The 10 Best Scary Sounds and Horror Sample Packs for Spooky Tracks: via LANDR Blog
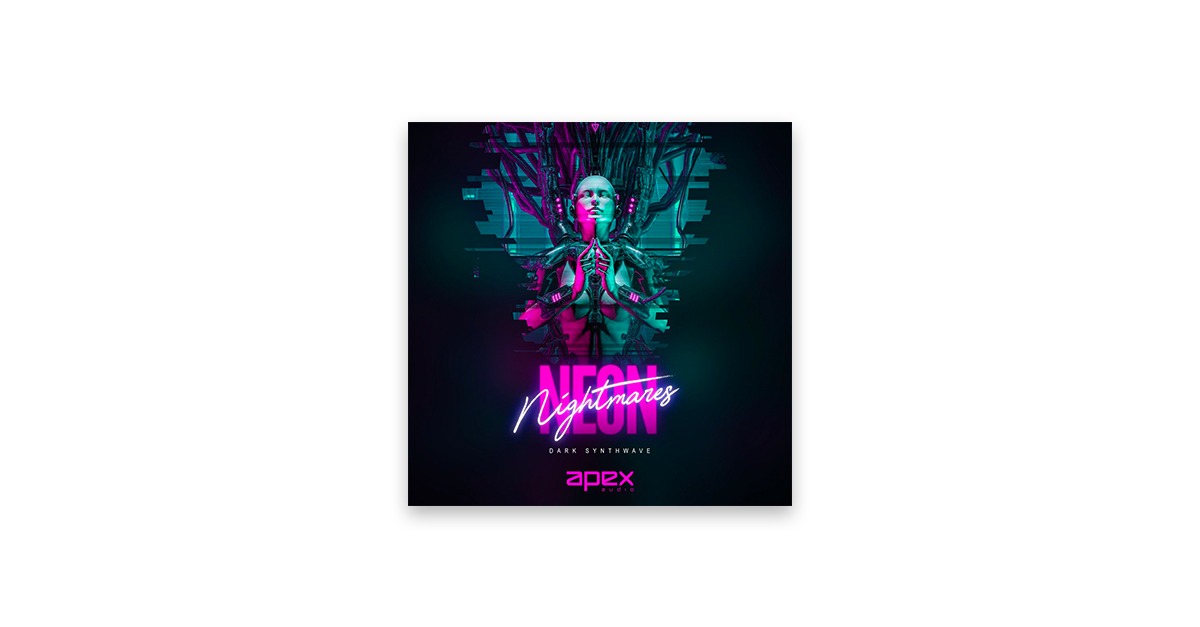
Spooky season is upon us and it’s the perfect time to hunker down and make boo-eats and “trick or tracks.” To make your Halloween themed soundtrack you’ll need an ample selection of scary sounds, cursed samples, blood-curdling screams and horrifying SFX. That’s why we’ve pieced together a list of the best scary sound packs and horror samples. What—are you scared? Let’s dive in. 1. Neon Nightmare – Dark Synthwave
Worthy of a retro-horror soundtrack, the Neon Nightmare sample pack is your go-to for 80s themed synth drones, leads and chords. Get samples that sound like they came from the opening credits of an old school slasher flick. Our favorite sample from the pack: AANN_Bass_Neon_Dark_keyBmin_85bpm 2. Stranger Sounds
If the sound pack’s namesake doesn’t give it away, this sample pack is based on the critically lauded soundtrack of a certain Netflix series involving a Demogorgon and the number eleven. Fun fact: the ARP 2600 was the legendary synth that was used to make the series’ soundtrack. Our favorite sample from the pack: ESR_SRS_Arp_Loops_4_Fmin_85bpm 3. Dark & Scary Vocals
Demonic cackles, howling werewolves, screaming demons. That’s what you’ll find in Dark & Scary Vocals. Perfect for adding some SFX pads to your Halloween night DJ set. Our favorite sample from the pack: Vocal_35_125bpm 4. Freakin Scary EDM Vocals
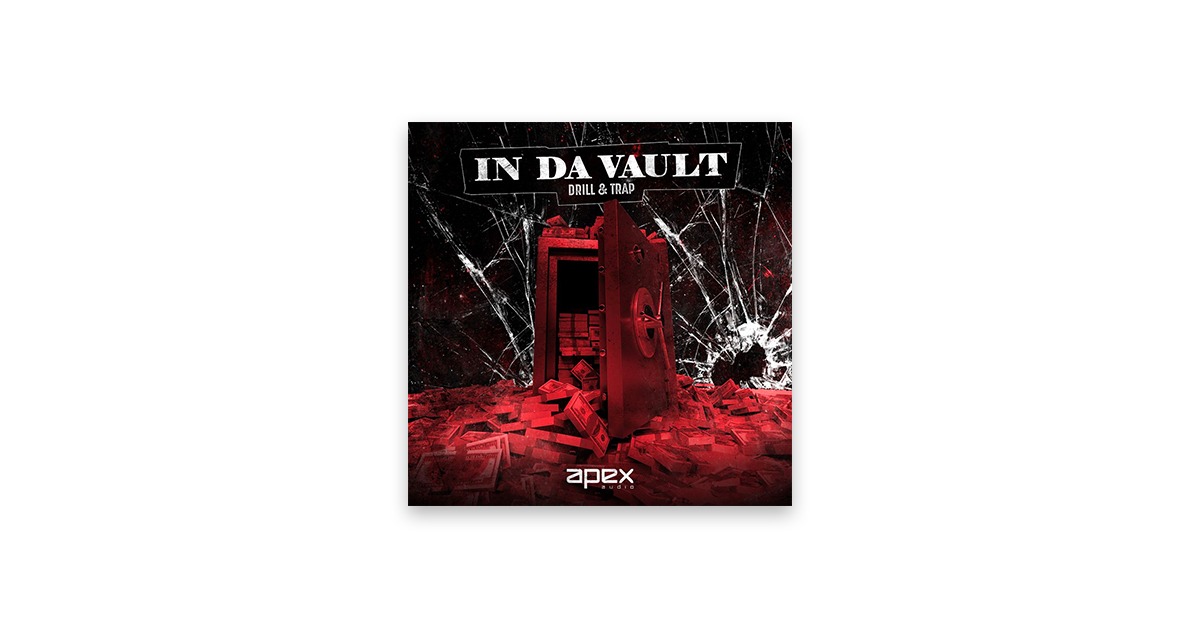
Every Halloween DJ mix needs a mix of scary vocal cameos from a demonic sounding voice. This sample pack delivers with scary sounding phrases and effects to remind your audience that it’s Halloween and it’s time to party. Our favorite sample from the pack: 125BPM_DVL_DONT_CARE 5. In Da Vault – Drill & Trap
This cursed vault of spooky samples is open for the taking. This is your go-to for, trap and drill samples that stay true to the horror trap sub-genre. Find creeping leadlines, unsettling chord progressions and jarring trap drum loops. Our favorite sample from the pack: AAID_Trap_Melodic Loop_160_Emin_sacred 6. Evolved Game Creatures – Monster Sounds
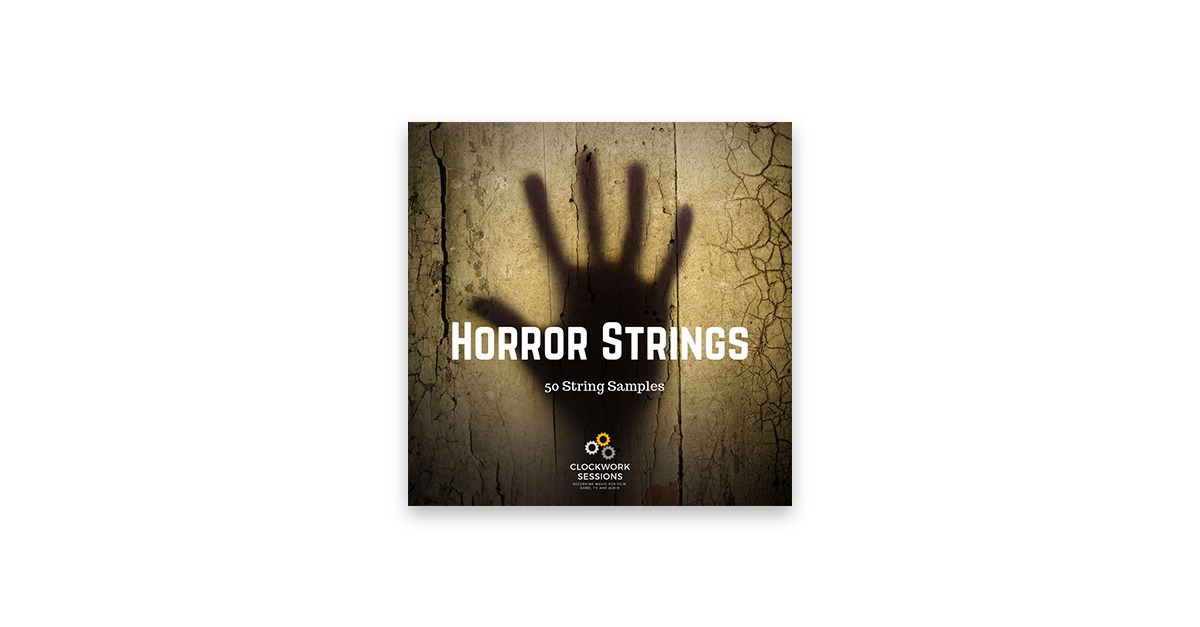
Who doesn’t love when everything starts falling apart in a scary movie. Personally, I find that moment when the monsters and beasts are unleashed and all hell breaks loose strangely comforting. One thing is for sure, a scary climax won’t have any impact without some good monster sounds like the ones you’ll find in this sample pack. Our favorite sample from the pack: ESM_One_Shot_Vocal_Sphinx_Monster_Attack_1_Saber_T 7. Horror Strings
Okay, strings are definitely the scariest instrument. Listening to this pack reminded me of how nauseating and unsettling they can be. And how much a simple dissonant drone over a slow-moving wide camera shot can create an incredibly scary atmosphere. If you need strings that’ll make anyone’s hair stand up, this sample pack is for you. Our favorite sample from the pack: Mildly_Perilous_Atmospheres_60BPM_Modal_1_ST 8. Symphonic Series Vol 11: Horror & Mystery
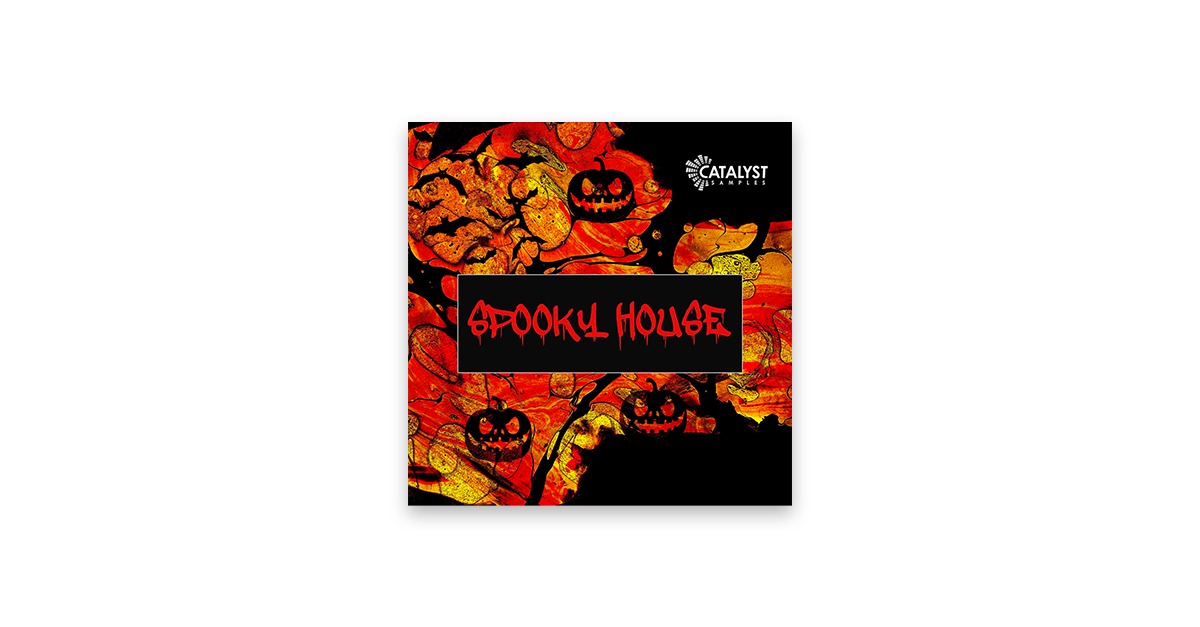
If a simple string arrangement doesn’t offer enough oomph for you, may I suggest the Horror & Mystery Symphonic Series where you’ll find horror-themed orchestral samples? Get crawling woodwinds, dissonant compositions, spoken incantations, a demonic choir and more! Our favorite sample from the pack: PL_SS11_01_Choir_42-52_120_A_Minor_Wet 9. Spooky House
Inspired by the dark industrial sounds of techno and house, this pack comes with everything you need to put a spooky atmosphere into your dance tracks. Find pulsing scrapes, creepy vocal effects, cinematic effects that are reminiscent of something you might hear on an Ed Banger record. Our favorite sample from the pack: Fx_3 10. Ultimate Horror Fx
If you’re still looking for that perfect horror sound here’s a great scary sound pack that’s full of sickening sounds, tense drones, creep sound effects and much more. You’re bound to find what you need for your spooky track or scary film. Our favorite sample from the pack: Drone_01_Em_125bpm The post The 10 Best Scary Sounds and Horror Sample Packs for Spooky Tracks appeared first on LANDR Blog. from LANDR Blog https://blog.landr.com/scary-sounds/ via https://www.youtube.com/user/corporatethief/playlists from https://stevehartcom.tumblr.com/post/631505879640981504
Mixing Hip-Hop: The Basics You Need to Get Started: via LANDR Blog
Mixing hip-hop can be much more difficult than creating it. When inspiration strikes during your music production process, you can have a finished track in just a few hours. But mixing it right can be a lot more difficult. If you feel the excitement from finishing your track dying down because you have to mix it, this article is for you. Here are my nine essential tips for mixing hip-hop that will help you finish your tracks faster. 1. Make your mix easier with good arrangementArrangement is how you structure the different instruments and sounds in your tracks. Getting it right can make mixing your track much easier. Common issues like a thin or harsh mix can be fixed surprisingly well by making good choices in your arrangement.
You can use a spectrum analyzer to give you hints about what’s missing in your track and how to help fill it in. Put the analyzer on your master bus and use your eyes to see what area of the frequency spectrum might need some attention. You might find your mix is missing an element in the low mid-range frequencies, or has too much information in the high end. Finding samples that will complement your existing arrangement is an easy way to add some harmonic density to solve this problem. If you’re feeling stuck or you’re just pressed for time, LANDR’s Selector tool can help find complementary sounds to help fill the gap. If all else fails, don’t be afraid to mute tracks or sounds that aren’t contributing positively to your mix—sometimes less is more when it comes to mixing hip-hop. 2. Gain stage your tracks for good headroomAdding lots of tracks to your session can cause your levels to pile up at the master bus. Push it too loud and your mix will start clipping. Clipping is the hard digital distortion that occurs when your levels go above 0 dBFS. The problem is especially common if you’re working with normalized samples that are already close this ceiling. Gain staging is how you fix it. Aim for an average level of -18dB FS (or a peak level of around -10dB FS on your faders) and your signals will have a healthy level going into your master bus. Once you’ve gain staged your tracks, start setting levels across your mix. Think about your arrangement as you set your levels and experiment with panning What do you want to be up front? What do you want to be in the back? How wide or narrow should each element be? Vocals tend to be the most prominent element in hip hop, along with the kick, snare, and bass. Center the rest of your mix around these prominent elements, and the rest should fall into place. 3. Use automation to get your mix movingAutomation is an underrated tool that can bring your mix to life. You can automate almost any parameter in your session. Go through your level changes, bump up certain parts and bring down others. Try automating your panning from left to right. Think about your musical arrangement when you’re using mix automation. Maybe you’ll want your synths to hang back in the verse and slowly get louder to stand out in the chorus. You can also automate your plugin parameters as you add audio effects to your mix. Automated reverb or delay effects are a perfect way to make vocal hooks memorable for your listeners. 4. Keep the vocals upfront for maximum impactLike I mentioned earlier, if your track has vocals, you want them strong and upfront in your mix. Vocals are probably the most important element when mixing hip-hop. The real power of hip-hop vocals is in the midrange and upper mid range (2 kHz – 7 kHz). Be aware of other elements in your mix that may clash in that frequency range. Make some subtractive EQ moves to any bright instruments to give the vocals some room to breathe.
The voice is a very dynamic instrument, so good compression can go a long way. Use a compressor to reduce the dynamic range of the vocals so they sit right in the mix. 5. Make space for your bass to hit hardThink about the two lowest instruments in a hip-hop track—the kick drum and the bass line. Choosing one clear element to take up this space will make make your mix more powerful. The first frequency area to look at is the sub bass range—around 30Hz to 60Hz. You’ll need to pick one sound for this area to get the clearest, most impactful sound. Your 808 samples are usually the best choice to dominate this range. If you have a kick drum that plays in sync with your 808, use EQ to filter out its lowest frequencies. Let it live in the low bass range, but pay attention to the upper mids so it can punch through the mix. Writing your 808 several octaves up to make sure it’s in tune with your song is a common trick amongst producers. After the line is written, bring the 808 back down to the sub bass range If you’re using a kick drum, let it dominate the sub bass and have your bass line on top in the low mids. Tuning your kick drum to the root note of your song will increase the power of the sub bass. A powerful bass drum sets up the foundation for the rest of your track. 6. Use parallel saturation to stand outYour listeners will hear your tracks on many different systems. Devices like cell phones and laptops can’t reproduce low frequencies very well. But you can still make your bass-heavy sounds work on these small speaker systems. The best way to do it is to use parallel saturation on your bass instruments. Saturation creates pleasing harmonic distortion that brings out the midrange and upper harmonics in a sound. Smaller speakers can still play back these overtones, which helps make your bass line audible. Setting up your saturation in parallel gives you the most detailed control and keeps your mix from getting harsh.
Sending your bass track to an aux return channel that has a saturation plugin on it. Then mix the amount of saturated signal with the original to get the perfect balance for your track. 7. Use effects to create textureMixing hip-hop isn’t unlike mixing any other type of music. Audio effects like reverb, delay and modulation are essential to compliment your arrangement and add life to your track. EQ and compression are staples when it comes to mixing, but creative effects are important too. Reverb and delay create ambient space. This adds an atmosphere for your mix to live in and provides a sense of depth to make your strongest elements stand out. 8. Master your music for the final polishEven if you’ve followed all the steps in this guide you might find your tracks still don’t hit quite right. The reason why has to do with mastering. Mastering is the final stage in music production that gives your tracks that release-ready sound.
It makes the subtle tweaks needed for your music to stand up against professionally produced tracks on streaming platforms. Mastering standardizes the volume and makes your track sound more balanced across different playback systems. This is essential if you’re planning to release your music with digital distribution. To get it right you’ll need to hire a mastering engineer or try AI-powered mastering online. LANDR mastering is the easiest way to get a solid master fast—and it costs much less than a hiring a pro mastering engineer. Keep working on your mixIf you’ve made it through this article you’ll have a great starting point for successful mix. Now that you have some ideas for mixing hip-hop it’s time to get back to your DAW and finish your track. The post Mixing Hip-Hop: The Basics You Need to Get Started appeared first on LANDR Blog. from LANDR Blog https://blog.landr.com/mixing-hip-hop/ via https://www.youtube.com/user/corporatethief/playlists from https://stevehartcom.tumblr.com/post/631441713166237696
Vocal Harmonies: 5 Ways to Get Lush Harmony Vocals: via LANDR Blog
Vocal harmony is a special sound. From soaring harmonized lead lines to classic stacks of backing vocals, vocal harmonies play a major part in many different genres of music. But knowing how to write good vocal harmony is tough, especially when you’re just getting started with music theory. Even so, learning how to do it is worth it and it’s not so hard once you grasp the basics. In this article I’ll go over everything you need to know about vocal harmonies—what they are, why to use them and five helpful techniques to write them. Let’s get started. What are vocal harmonies?Vocal harmonies are additional vocal lines sung in time with the lead vocal at different musical intervals. Vocal harmonies are used in music to complement the lead vocal and create chords and harmonic textures. Harmony vocals can be sung by multiple singers or a single singer overdubbing tracks in a DAW or multitrack recorder. Why use vocal harmonies in your music?Vocal harmony is a powerful sound that’s commonly used in almost every genre of music. Harmony vocals have a much different effect than other harmonic instruments like guitar or keyboards when used to reinforce chords and progressions. Vocals have a unique timbre that adds a distinctly human element to a track when used harmonically.
In arrangement, vocal harmony can boost, augment or create contrast to a lead line. Vocal harmonies can even become the song’s hook when they’re part of a memorable chorus or call-and response figure. How to create vocal harmonyTo create vocal harmony you need to know a little bit about harmony in general. You don’t have to be an expert in music theory to write harmony vocals, but knowing the basics will help you get good results faster. If you need an overview of harmony or intervals in music, head over to our resources to brush up. To get you started, here’s the quick version of the concepts you need to know. Harmony is how individual lines and notes interact with each other. They can be above or below the main melody. Harmony lines can move with three different types of motion:
The distance between notes in the harmony is determined by their intervals. Choosing the correct intervals and motion in your harmonies is how you get a pleasing, consonant sound.
5 ways to write lush vocal harmonyWith the basics out of the way, here are my top picks for the easiest and most effective ways to write vocal harmony. 1. Use parallel motion to create chordsParallel motion is the easiest way to create a vocal harmony line. Even so, it’s one of the most commonly used techniques in modern genres. That’s because parallel harmonies sound great and are easy to sing. To write a parallel harmony you simply have to stack a line that follows the same melodic contour on top of the original.
That line needs to follow the notes in the song’s key to sound good. If you need help finding what notes to use in the key, head over to our guide to key signatures to learn more. Most parallel harmony vocals start with a third interval above the main melody line. If you follow the pattern of the song’s key and keep the harmony line a third above, you’ll probably end up with a usable vocal harmony—easy! 2. Follow the chord tones of the song’s progression Here’s some resources to help you with that if you need: Each chord in your chord progression is made up of chord tones: they are 1-3-5 for triads and 1-3-5-7 for seventh chords. If you know what these are for each chord in your progression you can trace a smooth, singable line between them in your harmonies. Hot tip: Placing chord tone harmony on the strong beats and passing tones on the weak beats is an easy way to keep your vocal harmony sounding clear and consonant. 3. Use a second complimentary melodyHave you ever listened to a vocal line and heard another melody floating on top in your head? That’s the basic idea behind this way of writing vocal harmonies. Some lines and hooks naturally lend themselves to a catchy countermelody. This example shows how to develop a countermelody with samples, but the concept is the same with a vocal line Look out for complimentary melodies while writing your main lines and see if they work on top of the lead. 4. Create harmonies with MIDI and your DAWModern DAWs let you work with the human voice like any other instrument. There are lots of different ways to manipulate vocals to create harmony, but here’s a quick method that’s easy to use in your mixing and arranging workflow: 5. Use pedal point for easy oblique motionSometimes vocal harmony doesn’t have to be complicated. You can easily create a compelling harmony by leaving one voice to rest on a single note while the other continues the melody.
In arrangement, this technique is called pedal point and it’s used almost everywhere in music. Look out for passages where the harmony vocal can rest and create interesting oblique motion with the main melody. Perfect harmonyVocal harmonies will add a special quality to your songs. Whether you want to create lush leads or sophisticated backups, knowing how to write vocal harmony will improve your arrangement skills. Now that you have some ideas for how to create vocal harmony, get back to your DAW and keep working on your tracks. The post Vocal Harmonies: 5 Ways to Get Lush Harmony Vocals appeared first on LANDR Blog. from LANDR Blog https://blog.landr.com/vocal-harmonies/ via https://www.youtube.com/user/corporatethief/playlists from https://stevehartcom.tumblr.com/post/631422834653151232
Why These 3 Indie Artists Found Viral Success on TikTok: via LANDR Blog
For pop music to chart these days it pretty much has to go viral on TikTok. It’s a key platform for reaching new audiences on social media. Even past hits like La Roux’s “Bulletproof” or Fleetwood Mac’s “Dreams” got a second wind with Zoomers from viral moments on TikTok. For me, it started with Lil Nas X’s breakout single “Old Town Road”. Ever since he proved that tapping into meme culture is the key to modern success, the mainstream music industry has followed suit. Today, we still see Cardi B & Megan Thee Stallion’s “WAP” trending on the app’s “For You” pages weeks after its release. K-pop stars Blackpink are also dominating the platform right now with “How You Like That”. There’s no doubt about it. TikTok is a critical marketing strategy for today’s biggest stars. But what about independent artists? What’s the secret that helped an unsigned and unknown artist like Lil Nas X achieve success? Here’s how three lesser-known artists made the platform work for them. Salem Ilese – “Mad at Disney”Salem Ilese’s debut release dates back to 2018. But it was her viral single “Mad at Disney” that broke her into the mainstream. When the single reached the top of Spotify’s global “Viral 50” chart it broke out of its underground bubble and landed on the platform’s “Today’s Top Hits” playlist. The song only just came out at the end of July 2020, so we might be witnessing the early stages of a massively successful single. TikTokers love simplicity
“I’m mad at Disney, Disney They tricked me, tricked me Had me wishing on a shooting star But now I’m twenty-something I still know nothing Bout who I am or what I’m not” The lyrics catch your attention right away, backed by a minimalist electric guitar arpeggio. The bare arrangement highlights Salem Ilese’s naive-yet-charming vocals. Unsurprisingly, this is also the part TikTokers seem to like the most. Perhaps the song wasn’t designed with a viral destiny in mind. But it certainly provides the perfect backdrop for anything and everything cutesy. Tai Verdes – “Stuck in the Middle”
Tai Verdes is a completely independent newcomer. With his first single “Stuck in the Middle”, he hit the top of the US “Viral 50” chart on Spotify, almost out of the blue. Now he’s on global “Viral 50”, too. 10 million streams and counting is not a bad look for a debut single. TikTokers love vulnerabilityThere’s one similarity that’s noticeable between the case of Salem Ilese and Tai Verdes’s TikTok success. Both artists highlight the lyrics through expressive, vulnerable and engaging vocal delivery. “Stuck in the Middle” is about the ugly realities of the beginning and ending of modern romantic relationships. Here’s Tai’s top line over the modest arrangement: “’Cause we’re stuck in the middle of lovers and friends And we’re losin’ every part of the benefits You hurt me more than I ever knew But it’s shitty ’cause I’m doin’ the same to you” But even more than the lyrics—it’s the accessible, feel-good bass line the song starts with that’s attractive to all TikTok users. Just scroll through the thousands and thousands of drawing, cooking and tutorial TikToks featuring “Stuck in the Middle” and you’ll see what I mean. Curtis Waters – “Stunnin'”
North Carolina-based artist Curtis Waters got on TikTok before officially releasing his hit, “Stunnin’” earlier this year. It all started with a deliberately awkward dance routine Waters came up with for the song. But it didn’t take long before fashionistas of TikTok took notice of the lyrics and paired it with a “What I would wear…” challenge. TikTokers love dances and challengesThe key to this song’s success is pretty obvious—once a song gets paired with a TikTok challenge, there’s no stopping it. After all, TikTok was originally imagined as a platform for social games, challenges and lip syncing. So try and invent something fun like a special dance move, challenge or lyric idea to go along with your single. Get your music on TikTokOne thing’s for sure—you’ll never find any viral success on TikTok if your music isn’t available online through a digital distribution channel that has access to the platform. LANDR Distribution is your best option for getting your music on TikTok and every other streaming platform imaginable. Not only do you get lots of good exposure from putting music on TikTok, you also get paid for each stream. So definitely make sure your music is available on the platform. TikTok music is importantWhile growing in popularity around the world, TikTok has also somewhat leveled the playing field for big stars and independent artists. But knowing exactly who your target audience is is important.
Any genre can be successful on TikTok as long as the song’s concept is easy to follow. Just make sure that you grab the attention of the listener right away. Short and sweet hooks are essential. Offering listeners a relatable theme through your lyrics is definitely one way to get ahead of the curve, too. It’s important to recognize the significance of dance challenges and memes. But you should also set some time aside to better understand the unique tools this app has to offer. For instance, the duet feature allows users to easily lip sync and collaborate. The standard “upbeat songs make it big” rule doesn’t always apply here either. But it is evident that TikTok users enjoy tracks that are playful and uplifting. Above all else, what TikTokers want is songs they can easily adapt to their own world.
The post Why These 3 Indie Artists Found Viral Success on TikTok appeared first on LANDR Blog. from LANDR Blog https://blog.landr.com/tiktok-music/ via https://www.youtube.com/user/corporatethief/playlists from https://stevehartcom.tumblr.com/post/631252977156554753 |


 RSS Feed
